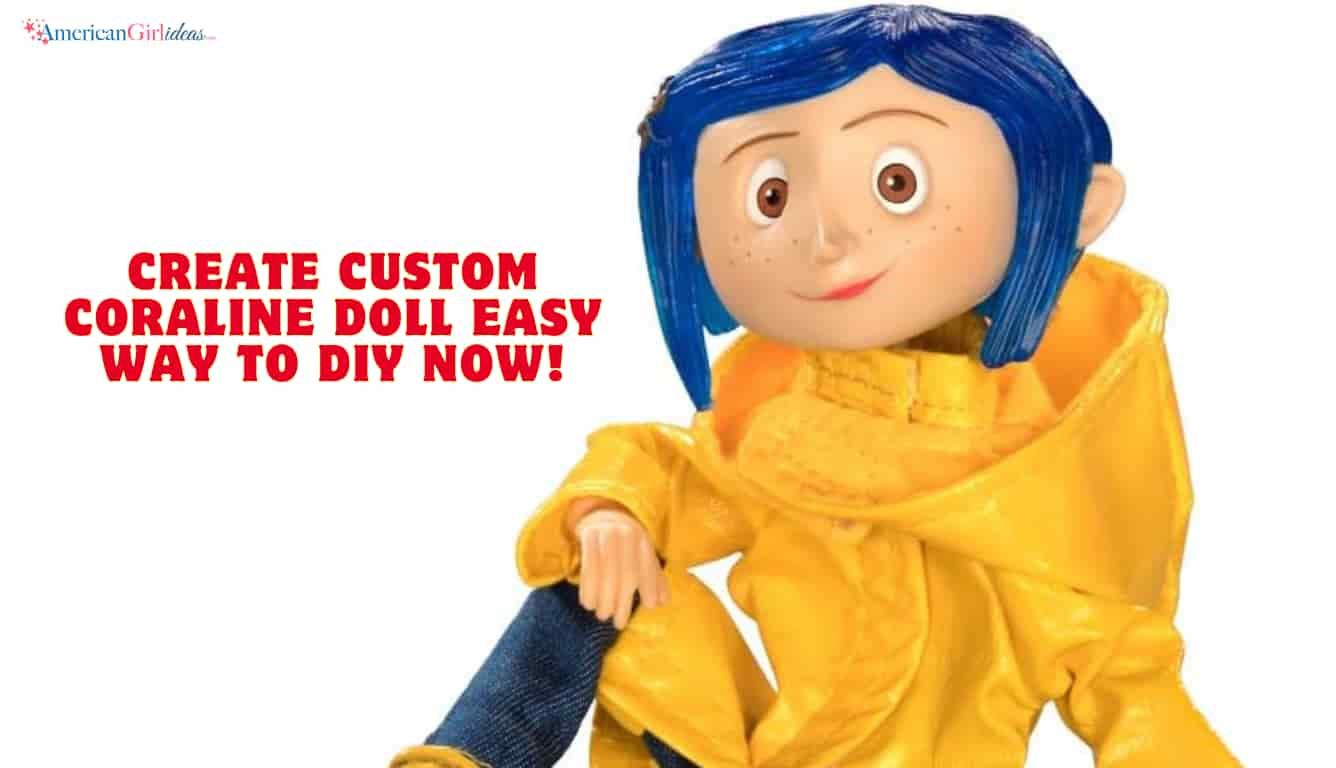
The movie “Coraline,” with its mix of charm and chills, has won over audiences everywhere. A memorable part of that world is the “mini-me” doll – a tiny replica that captures imaginations and might give a slight case of the goosebumps. You don’t have to be an expert to create a custom Coraline doll; it’s not about getting every detail just like in the movie. It’s about using colors and styles that remind you of Coraline and adding your own special touch to it.
This blog post is a friendly guide to help you make a Coraline doll. We’ll guide you through each simple step, from choosing your materials to adding those final special touches. It doesn’t matter if you’re new to crafting; this guide is made just for you. So let’s get started and have some fun as we bring a bit of Coraline’s magical world into our own.
A Guide for Coraline Crafters
Making your own Coraline doll is more than just a craft; it’s a creative journey into self-expression, a way to weave a bit of her brave soul into the fabric of our lives. This endeavor is perfect for anyone with a penchant for creation, whether they’re dedicated Coraline enthusiasts or simply love the hands-on charm of DIY projects. It doesn’t matter if you’ve got a wealth of crafting experience or if this is your first foray; this guide is tailored for all skill levels.
As we embark on this project together, we’ll explore the essentials you’ll need, provide you with detailed, step-by-step instructions, and sprinkle in some tips to help you infuse your creation with individuality. Prepare your crafting space, embrace your creative spark, and let’s start on this exciting path to bringing forth a Coraline doll that’s as bold and enchanting as the character who inspired it.
Materials Needed To Craft The Doll:
Here’s what you’ll need to bring your Coraline to life:
- Soft fabric: Soft fabric for the body, like cotton or felt.
- Blue Yarn: Yarn for Coraline’s vibrant blue hair — the brighter, the better!
- A sewing kit: Containing threads of various colors, needles, fabric scissors, and perhaps a sewing machine if you’re comfortable using one.
- Felt: Felt in various colors for the clothing and accessories.
- Doll eyes: Doll eyes, which can be purchased, or buttons for a more canonical Coraline look.
- Stuffing material: Polyfill or Cotton to Shape the body
- Acrylic paint and brushes: Non-toxic acrylic paint for details on the face and shoes.
- Polymer clay: if you choose to sculpt the face; alternatively, embroidery materials for a soft-sculpture face.
- Miniature accessories: Optional
These materials can be found from craft stores, thrift shops, or online marketplaces. Always be on the lookout for possible substitutes — for example, old clothes that can be upcycled into doll garments or accessories.

Steps To Customize The Doll
Now, let’s get into the details. Here’s the step-by-step process to create your custom coraline doll.
1. Crafting the Body:
- Trace pattern onto your fabric. If you don’t have a pattern, you can draw a simple outline of a doll’s body.
- Cut two pieces of the fabric using your pattern, adding a 1/4 inch extra to cut.
- Stitch around the edge, leaving a gap for stuffing.
- Turn the body right side out and fill it with stuffing material.
- Stich opening to close the body .
2. Making the Face of Doll:
- Shape polymer clay into a nose, mouth, and eyes. Bake the shape following the clay’s instructions. Once cooled, glue this onto the doll’s face.
- For a soft face, embroider the eyes, nose, and mouth directly onto the fabric with thread, or sew on buttons for eyes.
- Paint freckles or blush with acrylic paint.
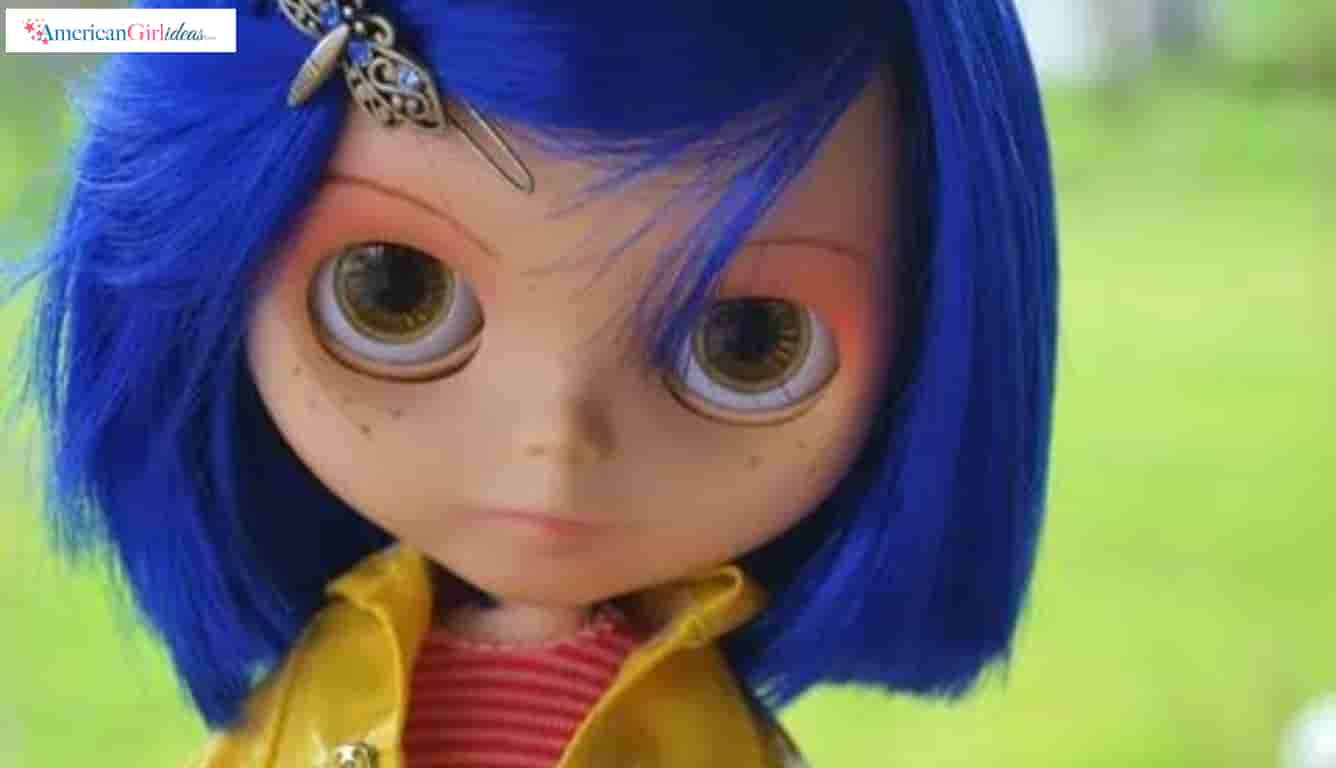
3. Creating the Hair:
- Cut strands of blue yarn to the desired hair length.
- Attach the yarn to the doll’s head by sewing or gluing. Ensure the front has enough strands to replicate Coraline’s bangs.
- Style the hair into Coraline’s signature bob, trimming where necessary.
4. Sewing the Cloths:
- Using a pattern or freehand drawing, cut out pieces for Coraline’s clothing from the chosen fabrics.
- Sew the pieces together to form the clothing. For the yellow raincoat, remember to add snaps or buttons down the front.
- Add any decorative details such as pockets or belt loops.
5. Assembling the Doll:
- Once the hair and face are in place, and the clothing is ready, dress the doll.
- Attach any separate limbs by sewing them to the body if they are not already part of the main body piece.
- Make sure all parts are securely attached.
6. Giving Finishing Touches:
- Create accessories like the dragonfly hair clip from small pieces of felt or painted clay.
- For Coraline’s messenger bag, sew a small fabric pouch and add a strap.
- Paint or create boots from felt or leather scraps and secure them to the doll’s feet.
Personalizing Your Coraline Doll:
Consider diversifying her wardrobe or opting for a new hair shade. Craft small accessories such as a scaled-down version of the “Coraline” book, or a petite button key. Every extra detail is an opportunity to showcase your individual flair in your american girl dolls names design.
Conclusion:
At the completion of this DIY tutorial, you’ll be the proud creator of a unique Coraline doll, an embodiment of your commitment and fondness for the tale. Whether it adorns your bookshelf or becomes a cherished gift for another admirer, this doll transcends mere crafting. It stands as a memento, a catalyst for dialogue, and an homage to a narrative that echoes with courage and creativity within us.
Call to Action:
Seeing your personally custom coraline doll would truly be a joy. Feel free to post your journey and the finished doll either here in the comments or on social platforms, tagging it with #DIYCORALINE. For those who hunger for more crafting adventures or want to plunge deeper into DIY territory, keep up with this blog. The insights and crafts you share inspire not just us, but also a whole community of creators and visionaries. Enjoy your crafting journey!